Webrogue Part 1: map, viewport, and movement.
Today, we start a new project: a roguelike game with ascii graphics that is played in the browser. This part 1 is playable, but all you can do so far is move around on a map.
You can find the source code and corresponding deployment at the following links:
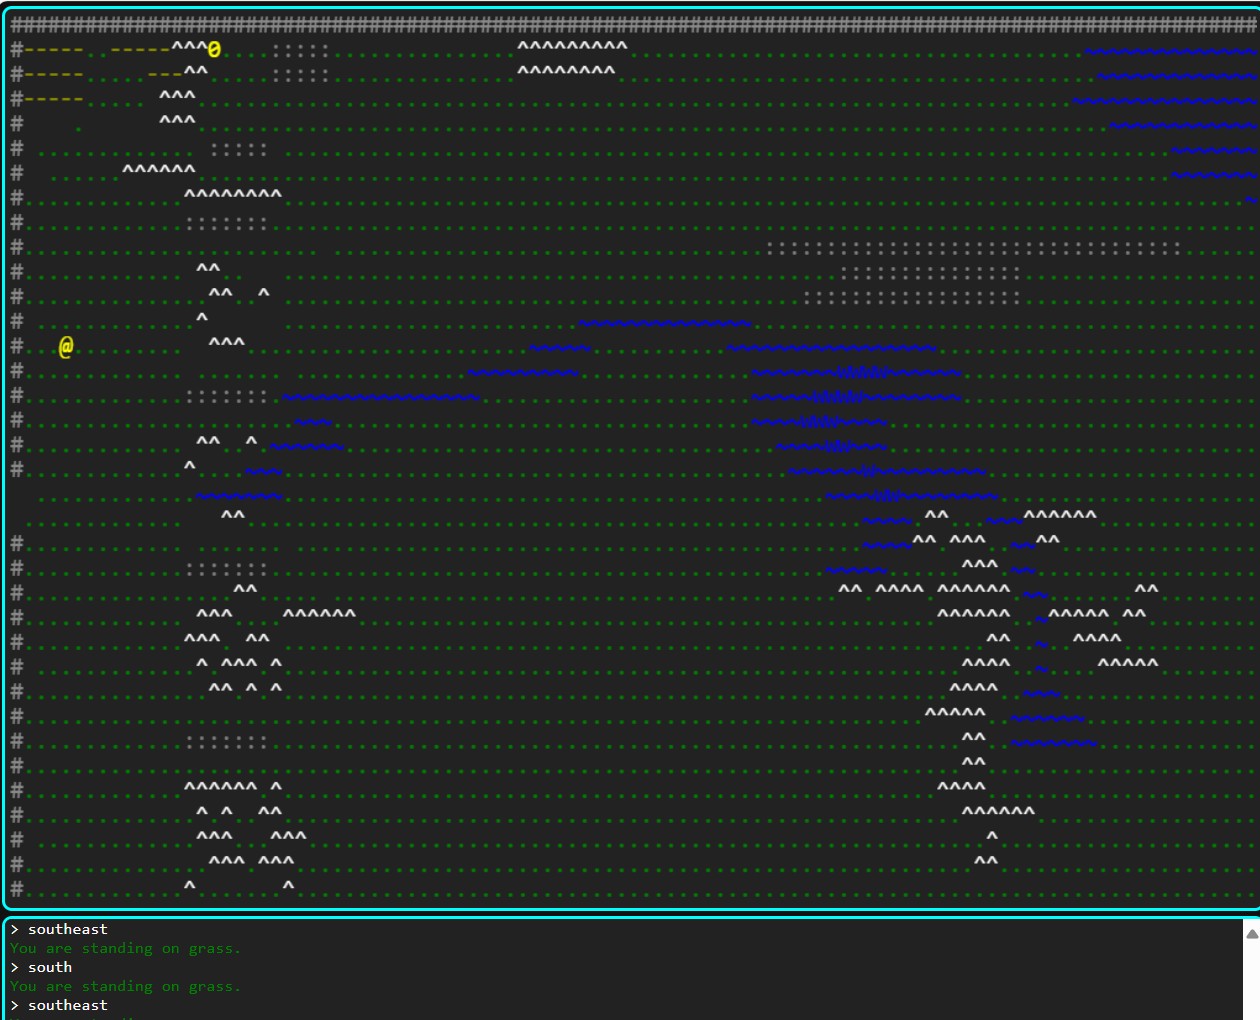
Your player is the @ character.
Use the Q, W, E, A, S, D, Z, X, C keys to move around in the eight directions:
  Q      W      E
     \   |   /

  A  -   S   -  D

     /   |   \
    Z    X    C
ChatGPT was consulted extensively, first as a starting point, and then later for help when we ran into trouble (e.g. with the canvas re-sizing problem).
I’m using TypeScript, because I intend to work on this project for a while, and in the long run, coding in JavaScript is much less painful when it’s strongly typed. However, it can be a huge pain to set up your project correctly, and ChatGPT can actually be a hindrance here, rather than a help. If you’re doing your own project, you could certainly use plain javascript if you prefer.
Major Features
In addition to movement in eight directions, here are the major features.
Colorful and configurable terrain types
Terrain types are in the file terrainTypes.json and look like this:
{
    ".": {
        "fg": "green",
        "bg": "black",
        "sameSquareInteraction": "standing on",
        "description": "grass",
        "isPassable": true
    },
    "~": {
        "fg": "blue",
        "bg": "black",
        "sameSquareInteraction": "wading in",
        "description": "shallow water",
        "isPassable": true
    },
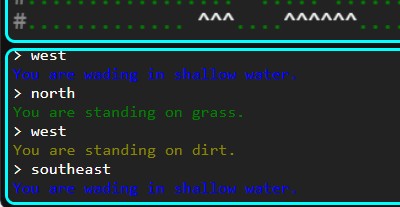
Player feedback - also configurable
You’ll notice that in the terrainTypes json shown above, there is also something called “sameSquareInteraction”. This is used to facilitate descriptive text:
Easy and intuitive map editing
The map is represented as an array of strings, which lets us keep it under source control in a manner that is visually similar to how it’s shown onscreen, which makes it easier to read and write maps. You can see the first few lines of source code, and part of the rendered map, below.
   "terrainRows":  [
"##########################################################################################################",
"#-----..-----^^^0....:::::...............^^^^^^^^^.....................................~~~~~~~~~~~~~~ww..#",
"#-----.....---^^.....:::::...............^^^^^^^^.......................................~~~~~~~~~~~~~www.#",
"#-----..... ^^^.......................................................................~~~~~~~~~~~~~~~~www#",
"#    .      ^^^..........................................................................~~~~~~~~~~~~~www#",
"# ............. 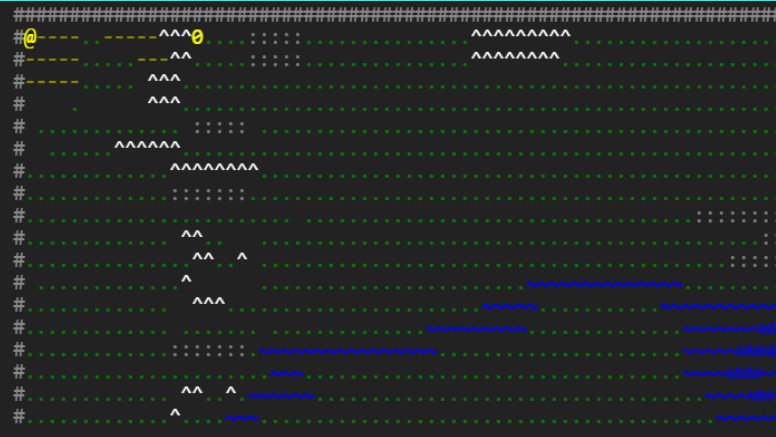
A viewport smaller than the size of the map that scrolls correctly
It’s not trivial to get the viewport to update properly as the player moves around. For example, we want the player’s icon to stay in the center, but only if we aren’t close to the edge of the map (if we stayed in the centre, we’d have to show some empty space where the map ends, which we don’t want).
Here’s most of the relevant code:
  function drawMap() {
    const halfX = Math.floor(viewportWidth / 2);
    const halfY = Math.floor(viewportHeight / 2);
    const startX = Math.min(Math.max(0, player.x - halfX), mapWidth - viewportWidth);
    const startY = Math.min(Math.max(0, player.y - halfY), mapHeight - viewportHeight);
    const endX = Math.min(mapWidth, startX + viewportWidth);
    const endY = Math.min(mapHeight, startY + viewportHeight);

    ctx.clearRect(0, 0, canvas.width, canvas.height);

    for (let y = startY; y < endY; y++) {
      for (let x = startX; x < endX; x++) {
        let char = terrain[y]?.[x] ?? " ";

        if (x === player.x && y === player.y) char = "@";

        const terrainType = terrainTypes[char];
        ctx.fillStyle = terrainType?.fg || (char === "@" ? "yellow" : "red");
        ctx.fillText(char, (x - startX) * cellWidth, (y - startY) * cellHeight);
      }
    }
  }
The idea is to keep track of “start” co-ordinates of the viewport, in the x and y directions (startX and startY in the code above). These are calculated based on the current location of the player - so startX is simply the player’s x location, minus half the width of the viewport (tracked as halfX). The tricky part is to take the maximum between zero (the leftmost coordinate possible) and the player’s location minus half the viewport width, thus ensuring that when the player is close than half a viewport to the left edge, we don’t end up with a negative number. Then, we use that number or the number mapWidth - viewportWidth, whichever is smaller, as the Starting (leftmost) x-coordinate of the viewport. Then the rightmost x-coordinate is just the leftmost plus the viewport width.
Correctly re-sizing the page elements
The hardest part of this project so far has been getting the layout to behave how I want when the window is maximized or re-sized, or zoom level is changed.
Here’s the meat of the solution, a function that resizes the canvas before redrawing the map:
  function resizeCanvasToFit() {
    viewportWidth = Math.floor(canvas.offsetWidth / cellWidth);
    viewportHeight = Math.floor(canvas.offsetHeight / cellHeight);

    canvas.width = viewportWidth * cellWidth;
    canvas.height = viewportHeight * cellHeight;
    ctx.font = `${cellHeight}px monospace`;
    ctx.textBaseline = "top";
    drawMap();
  }
We need to call the resize whenever we receive the “Resize” event, and we also want to call it when the page first loads:
  // we need this timeout or resize happens incorrectly
  let resizeTimeout: number | undefined;
  window.addEventListener("resize", () => {
    clearTimeout(resizeTimeout);
    resizeTimeout = window.setTimeout(() => {
      requestAnimationFrame(resizeCanvasToFit);
    }, 100);
  });

  resizeCanvasToFit();
Finally, the contents of the entire game.ts file are wrapped in a handler for the DOMContentLoaded event. This is apparently necessary due to some timing issues that clobber or undo the resize logic. Frankly, I didn’t understand much of this - I had ChatGPT help me fix the visual issues to end up with this solution through a lot of trial and error.
window.addEventListener('DOMContentLoaded', async () => {
  const canvas = document.getElementById("canvas") as HTMLCanvasElement;
  const ctx = canvas.getContext("2d")!;
Conclusion
I hope this helps someone. I’m intending to spend a long time on this project, but my ideas aren’t fleshed out well enough yet to elaborate on what the final product might look like. Check back here for more posts.